
Setting up a road bike for different positions (comfort, race or endurance) is relatively simple so here’s a few tips to help set up your bike to get the best position for individual needs.
Road bikes are the fastest and most efficient way to get from A to B on road. Doing so in comfort is another thing.
The needs of road riders can be categorised as three separate things: race, comfort and endurance.
Race frames are lower at the front to keep the body down and help aerodynamics. Geometry is usually steeper to give more precise steering and better feedback. Race frames are all about lightness and aerodynamics so may not be the most comfortable as speed is more important.
Frames built for comfort tend to have a tall head tube to help keep you more upright at the front, easing the back and shoulders, and relaxed geometry to soak up bumps and keep steering stable.
Frames built for endurance rides are a compromise of both worlds. Comfort is important for long hours in the saddle but not at the total expense of speed.
 Saddle height and position
 Saddle height and position
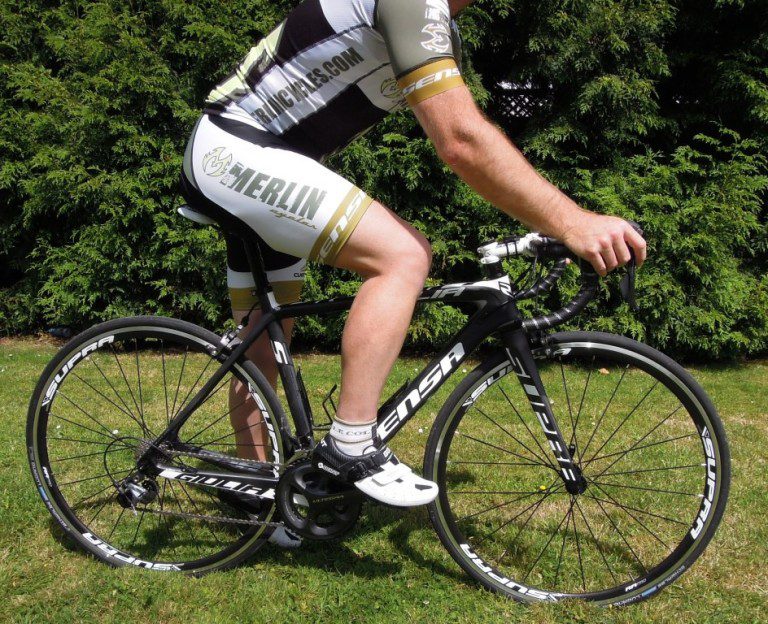
A major factor is the saddle height. Forget about being able to touch the ground with both feet flat while sitting in the saddle as this is inefficient for cycling any distances.
Research suggests that having the saddle height out by just 1-1.5cm can make a very big difference in your cycling efficiency. The reason for this is that when the saddle height is not correct, unnecessary and inefficient movement is created at the hip, knee and ankle joints.
If your knee is locked straight your saddle is too high and vice versa if your knee is bent the saddle is too low.
Raising or lowering the saddle is a 5 second job. Research shows that even a lot of experienced cyclists run their saddles a tad too low. The aim is to set a saddle height that leaves some bend in the knee at the bottom of the pedal stroke, when you’re pedalling with the balls of your feet over the pedal axles. You shouldn’t have to rock your hips through each crank rotation.
The saddle may feel too high for a couple of miles but then your body will warm up, loosen up and it will feel comfortable. If it then still feels too high, lower the saddle a few mm and ride another couple of miles.
Correct saddle height is a constant. There’s no raising it for racing or lowering it for touring. Your saddle height should be the same no matter what sort of road cycling you’re doing.
The actual position of the saddle can have an effect on comfort so make sure it is flat, use a spirit level if necessary, to avoid slipping off or moving around too much.
Comfort – For comfort the saddle should be level and slightly forward of the medium setting to keep the body more upright and ease pressure on the back and shoulders
Race – For racing the saddle tends to be pushed further back to allow the leg to push more while also lowering the front of the body. The only exception to this is in time trialling or triathlon where the saddle is pushed very far forward to allow for more powerful leg leverage and open up the leg angle as the body tends to be much further forward on aero bars or in the tuck position.
Endurance – Setting the saddle for endurance riding is again the best of both worlds so a neutral position will make it comfortable without losing too much power.
Handlebar stem length
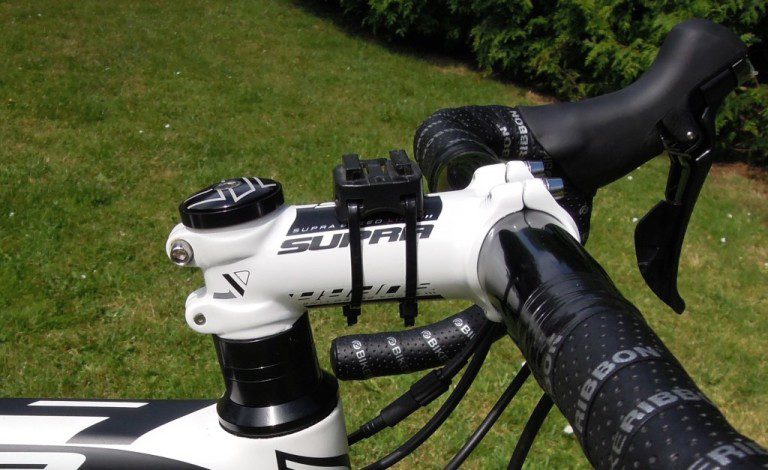
The handlebars and stem have a much bigger affect on comfort than you might imagine. If the stem is too long or too short you will either be overstretched or bunched up, both of which affects control as well as comfort.
Sit on the saddle and place the hands on the brake hoods as this is the furthest the body will lean. A good rule of thumb is to get the bars so that when the hands are on the drops your torso is about 40° from horizontal.
 Your upper arms at 90° or thereabouts to your torso with a slight bend at the elbow.
Comfort – For comfort a shorter higher stem means keeps the controls nearer and the body less stretched out, also keeps steering light but may become twitchy if too short.
Race – For racing a longer flatter stem is usually used to keep the front end down, the arms further forward and to slow the steering down.
Endurance – For endurance a neutral balance of height and length needs to be struck for comfort and control as well as not forsaking speed.
Handlebar width and controls position
Handlebar width and shape can also influence comfort and control. If they are too narrow the steering becomes twitchy while too wide and they can become unwieldy as well as being uncomfortable.
The length of drop, shape, distance forward (some extend further forward than others placing controls further away) and position of brake controls should all be taken into account as well.
A good rule of thumb is that the bars should be slightly wider than the width of the armpits across the chest.
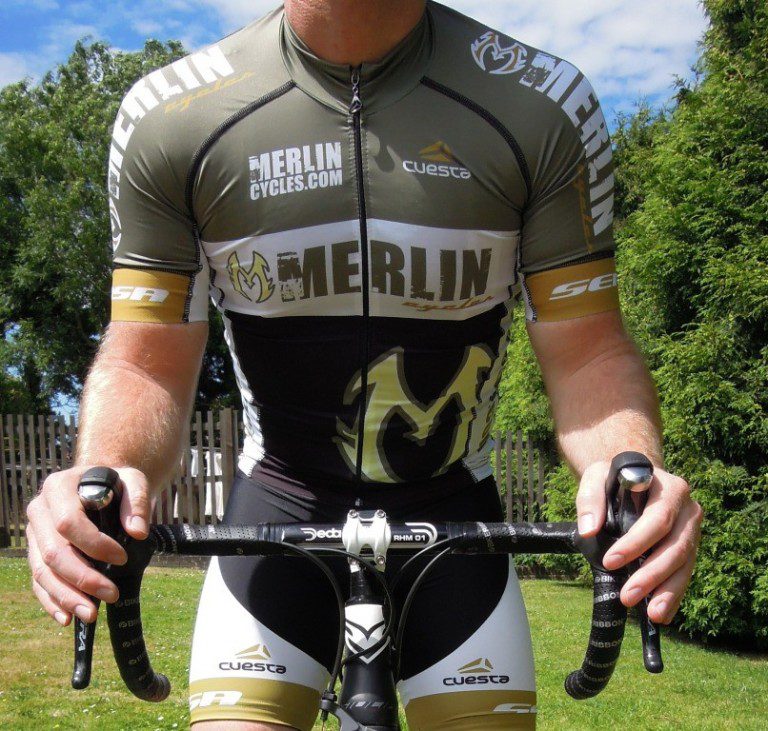
Comfort – For comfort a wider, shallow drop bar with short forward reach provides more control as the body is not stretched and aerodynamics aren’t as important. Brake/gear controls are normally placed higher to bring them closer to the body and easier to grab.
Race – The current trend is for bars to be slightly narrower to bring the shoulders in and hoods positioned slightly lower to keep the front end down. Shallow bars are very popular as they allow more time to be spent on the drops without too much strain.
Endurance – Endurance is again a balance of comfort and control. Bars are slightly wider than race set up to allow the chest to open up and provide a wider hand position. Hoods are set to medium height as comfort is more important.
Pedals and cleat position
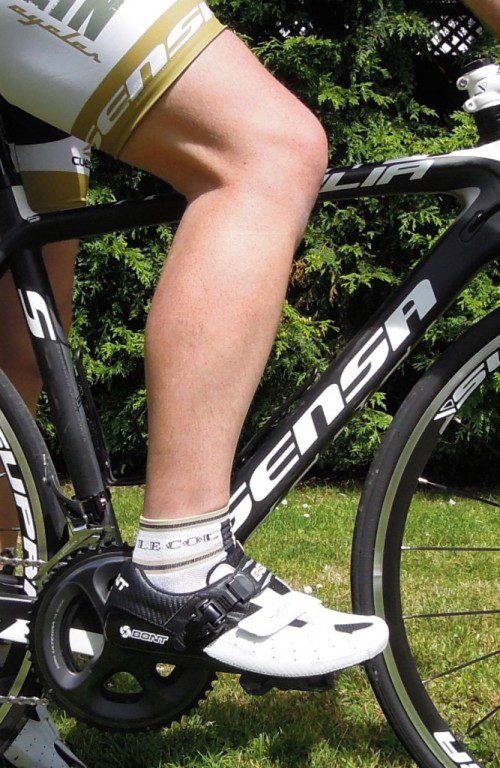
Luckily pedal and cleat position does not change no matter what level of cyclist you are. The cleat must be set right or else problems can develop.
 Most modern pedals have a degree of ‘float’ which allows the cleat to move slightly before disengaging but the shoe and cleat still need to be positioned correctly in the first place before float is taken into consideration.
There are a few basic rules when fitting cleats.
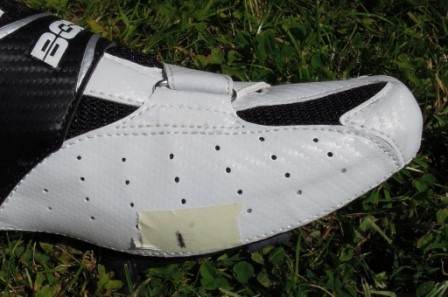
First is that the cleat should position the ball of the foot directly over the centre of the pedal axle. The easiest way to do this is to mark where the ball of the foot is on the shoe (masking tape and a pen is handy) and placing the cleat here to determine the fore and aft position.
Second is the angle of the foot in the pedal which should mimic your walking style ie. toe in or out. Very few people walk with the foot striking the ground straight so don’t be alarmed if your shoe angle is slightly off straight.
Setting the angle up usually takes a few attempts until you feel comfortable with the position so don’t expect it to happen first go and plan several short rides with time to stop and adjust position.
We’re here to help
If in doubt, feel free to give us a call on 01772 432431, or email sales@merlincycles.com, and we’ll help you out.
Have a look at the road bike parts we currently have on sale.