
Are you wheeling your bike out of its hibernation, because summer is just the best time for a bike ride? Maybe you are feeling guilty for just riding your bike, piling on the miles but not really looking after it? Either way, Follow our bike maintenance tips to keep your bike running smoothly and avoid any potentially costly issues.
Why Tho’?
No matter how much money you spend on a bike, if you just ride it, (without looking after it) it could be virtually unusable within a few weeks (depending on use & conditions). Bike parts are out in the open and susceptible to dirt, grit and mud. While we fully support Local Bike Shop mechanics, it makes sense to at least learn the basics to keep your bike working well.
Do it!
Luckily, there isn’t much to look-after compared to other forms of transport, and it can easily be done quickly, once you get into the habit. The good news is… This habit will save you money!
The other good news is that the most important bits of bike maintenance can be done easily at home, with just a few basic tools – check them out here.
Keep the Chain & Cassette Clean
Transferring your power into forward motion, your bike’s chain takes the strain. The chain makes around 30,000 individual metal-on-metal movements per minute at 90rpm. It also attracts the road grit sprayed up from the front wheel as well as droplets of sweat and drinks. All the gunky stuff that sticks to chains has two very negative effects. Firstly it reduces the efficiency of the drive train and secondly, gradually effects gear changes and accuracy of shifting – things get ‘clicky’.
Leaving a chain without any maintenance is a costly mistake. It will prematurely wear the cassette, chainrings and derailleur jockey wheels, all while you ride along, more and more inefficiently.
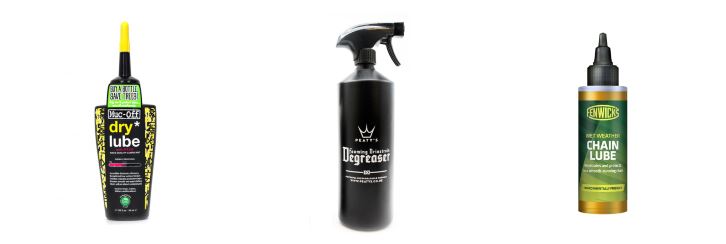
A good first step with chain maintenance is to assess how dirty it is. If there is a lot of dark ‘gunk’, then clean the chain, cassette, chainrings and jockey wheels. However, if everything looks pretty good, just clean the chain. If you clean the chain regularly, the build up on other components should not get too bad – in effect it saves a bigger job.
1 Wash the bike
2 Degrease the chain with degreaser & old rags, chain bath or old toothbrushes
3 Apply some fresh oil sparingly (one drop on each link
Don’t skip 1 & 2 (above) and just add lubrication – the gunky mess will only get worse…
Torque is Cheap
Every few months, check the bolts which hold components onto your bike, making sure they are tight. Careful though, it is easy to over tighten and strip the threads from the bolt. Luckily, most modern bike components come with fitting instructions including torque settings to make this job fairly fool proof. If you are unsure, use a torque wrench to ensure the tightness is just right. If you are fitting or re-fitting a component, a little smear of grease on the threads will allow it to be easily removed in the future.
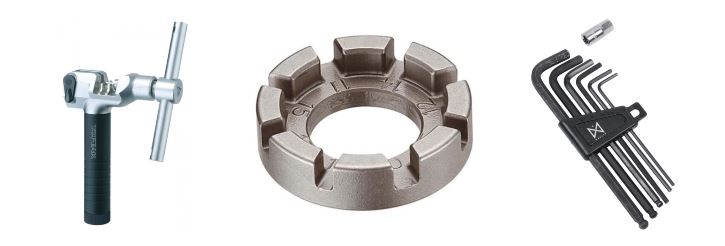
Smooth Hubs
Check to see if there is any ‘play’ or loose movement in wheel hub bearings. If there is, they will need to be adjusted or they will just get worse through use. They can eventually damage the axle or cone surface and require replacement. If the bearing is a sealed unit in the hub, the sealed bearing may need replacing. Which type of bearings are in the wheel can easily be found out with a google search. While most cup and cone bearings can be fairly easily adjusted, on Shimano hubs for example, some other wheels can be a little trickier. Cone spanners make adjustment easy, they are thin and are designed to fit the slim adjusting nuts on hub axles.
While checking wheels, make sure the wheel rims or rotors are not catching the brake pads.
Braking Bad?
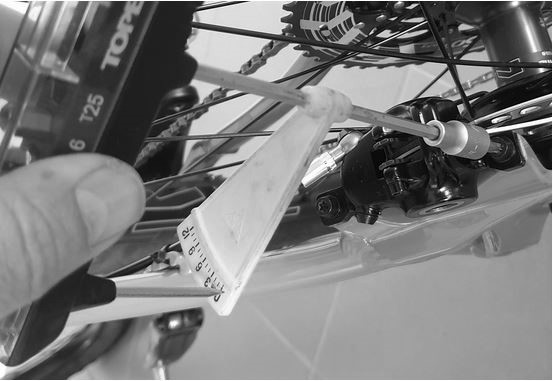
One of the worst feelings for a bike rider, is that a brake is catching and robbing your hard-earned speed. A good way to check this is to pull both brakes on and release, then lift the front and rear of the bike and spin the wheels one at a time. Listen out for the catching sound. For rim brakes, the sound will eminate from the rim, on disc brakes it will come from the rotor as it goes between the pads in the disc caliper.
For disc brakes there is often an easy fix. Undo the caliper mount bolts to loosen the caliper. Apply the brake, the caliper should centre itself equally to the rotor. Re-tighten up the caliper mounts and check they are not catching.
With rim brakes, the caliper may have pulled slightly to the side. Undo the caliper mounting bolt and pull the brake lever to activate the brake. While the lever is still activated tighten the caliper mounting bolt and the caliper should be centred to the rim. If this doesn’t help release the brake on the adjuster a little to avoid the wheel catching. This is a short term fix if your wheel is not true.
Whilst checking rim brakes, make sure the brake block / pad is fully contacting the rim. Pull the lever to activate the brake and check the position of the block on the rim. The rim and brake block should connect with each other flat edge to flat edge for maximum performance. Check for grit / flint / glass inbedded in the brake block, this will damage the rim braking surface.
Feel the Pressure
Under-inflated tyres force you to work harder on the bike and can cause punctures. Over-inflated tyres can be uncomfortable to ride over rough surfaces. Check the sidewall of the tyre for the tyre inflation range (if you are heavier than average, aim towards the top of the range, if you are lighter, go for the lower end). Take the guesswork out of tyre pressures with a floor pump with a gauge. .
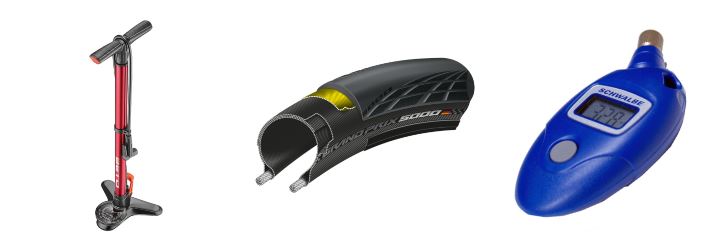
Two Tired?
Most inner tubes and tyres lose air over time. So tyres are likely to be soft if the bike hasn’t been used for a few weeks or longer. It is worth checking the condition of the tyre before using the bike. Look for signs of the rubber aging / cracking and any bulges or cuts in the tyre, these are easier to see when the tyre is fully inflated. As tyres are your only points of contact with the ground, do not risk worn or damaged tyres. Worn tyres are also more likely to puncture easier as rubber gets thinner.
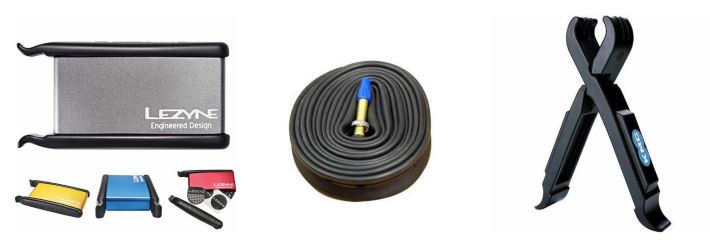
Flat Fix
Most bikes use inner tubes. A puncture fix firstly involves dropping the wheel out. Once the wheel is clear of the bike, you will need a couple of tyre levers to pop the tyre off the rim (refer to Youtube if you are not sure how). Once a side of the tyre is off the rim, the inner tube can be pulled out. At this point it is a good idea to check where the hole in the tube was in relation to the tyre – the thing which caused the flat tyre could still be lodged in the tyre. Carefully remove it, if it is still in there. If it has left a big hole, get a new tyre. If the inner tube hole isn’t big, (less than a couple of mm), either stick a patch on the old tube or replace it with a new inner tube.
Watch and Learn
The chances are, somebody has already done a video about anything you might be contemplating doing to your bike. If you can get through the first 10 seconds, usually along the lines of, “Hi Guys…. Welcome to my channel….. like and subscribe….” you can learn a lot. Also worth checking through comments / likes to help verify they are offering good help / guidance. Here are a couple of cool video channels to get you started.
Park Tools Videos – cover a wide range of bike related issues
GCN also have a range of videos covering real world fixes